3D-Printed Type Elements
Since 2022 I’ve been designing replacement type elements for antique typewriters — the small, precise components (typewheels, spherical “golf balls,” vulcanized rubber elements) that are frequently missing, damaged, or were never available in a given typeface to begin with. Each was originally conceived in OpenSCAD, is now generated by a parametric Python pipeline (more on that switch at the bottom of this page), and is 3D printed in high-precision resin, with per-machine dimensions and calibration values tracked in the Type-Elements repository. Machines below, roughly in the order I tackled them.
Blickensderfer Typewheels
The first type element I ever attempted, done in collaboration with Brent Carter, who handled font design and digitization while I handled the 3D printing and mechanical engineering. Early prototypes were modeled in Fusion 360 — validated with outsourced resin prints in this video — before I bought my own resin printer and switched to OpenSCAD, which handled the parametric draft-angle geometry far better than Fusion 360 could.
The result: brand-new typewheels for Blickensderfer models 5, 6, 7, 8, 9, and the Home Blick, in both DHIATENSOR and QWERTY layouts, including typefaces never previously available for these machines — Steile Zierschrift, Goudy italic, and Script/Vogue. The project was featured on Typewriter Revolution.
v4-generated Blickensderfer typewheel — the actual mesh, not a still render. Drag to rotate, scroll/pinch to zoom, right-click or two-finger drag to pan.
Related typewriters in my collection:
-
1909 Blickensderfer no. 5 (Serial: 133130)
-
1909 Blickensderfer no. 8 (Serial: 135255)
IBM Selectric Type Elements
The second attempt, starting with a Fusion 360 prototype — then shelved after another OpenSCAD Selectric model was released and I assumed the problem was already solved. It got reignited when a collector friend in Finland acquired a rare IBM Selectric Composer (a proportional/justified-type variant of the Selectric) and needed elements for it.
That became a fully remote collaboration: I designed in OpenSCAD and generated STL files from the US, he printed and tested them in Finland, and we iterated on fitment and character quality through photos and feedback with neither of us having direct access to the other’s hardware. Once dialed in for the Composer, the system was generalized to work for standard Selectrics too — fully parametric, accepting any keyboard layout, any font, and any key arrangement.
v4-generated Selectric Composer typeball — the machine that started this whole collaboration. Drag to rotate, scroll/pinch to zoom, right-click or two-finger drag to pan.
v4-generated standard Selectric typeball — the same generator, generalized from the Composer to any keyboard layout, font, and key arrangement. Drag to rotate, scroll/pinch to zoom, right-click or two-finger drag to pan.
Related typewriters in my collection:
-
IBM Selectric II
-
IBM Selectric I
Bennett Type Elements
The third project, and a different challenge from the previous two: Bennett Pocket Typewriters (c. 1910) use type elements made of vulcanized rubber, which is fragile and prone to cracking with age — original elements are scarce and often too damaged to use. Getting the geometry right took many OpenSCAD iterations, since the Bennett’s construction differs significantly from both the Blickensderfer and Selectric designs. The resin-printed result ended up more durable than the original rubber elements.
v4-generated Bennett type element — the actual mesh, not a still render. Drag to rotate, scroll/pinch to zoom, right-click or two-finger drag to pan.
Related typewriters in my collection:
-
1910-13 Bennett Pocket Typewriter (Serial: 14682)
-
1910-13 Bennett Pocket Typewriter (Serial: 18627)
Helios Klimax Type Elements
The fourth, done for a collector friend in Germany rather than my own collection. The Helios Klimax is an unusual and rare German typewriter with its own mechanical quirks, so this was another back-and-forth collaboration — he supplied measurements, photos, and fitment feedback on his damaged original, and I iterated the OpenSCAD model remotely until it fit and printed correctly on his end.
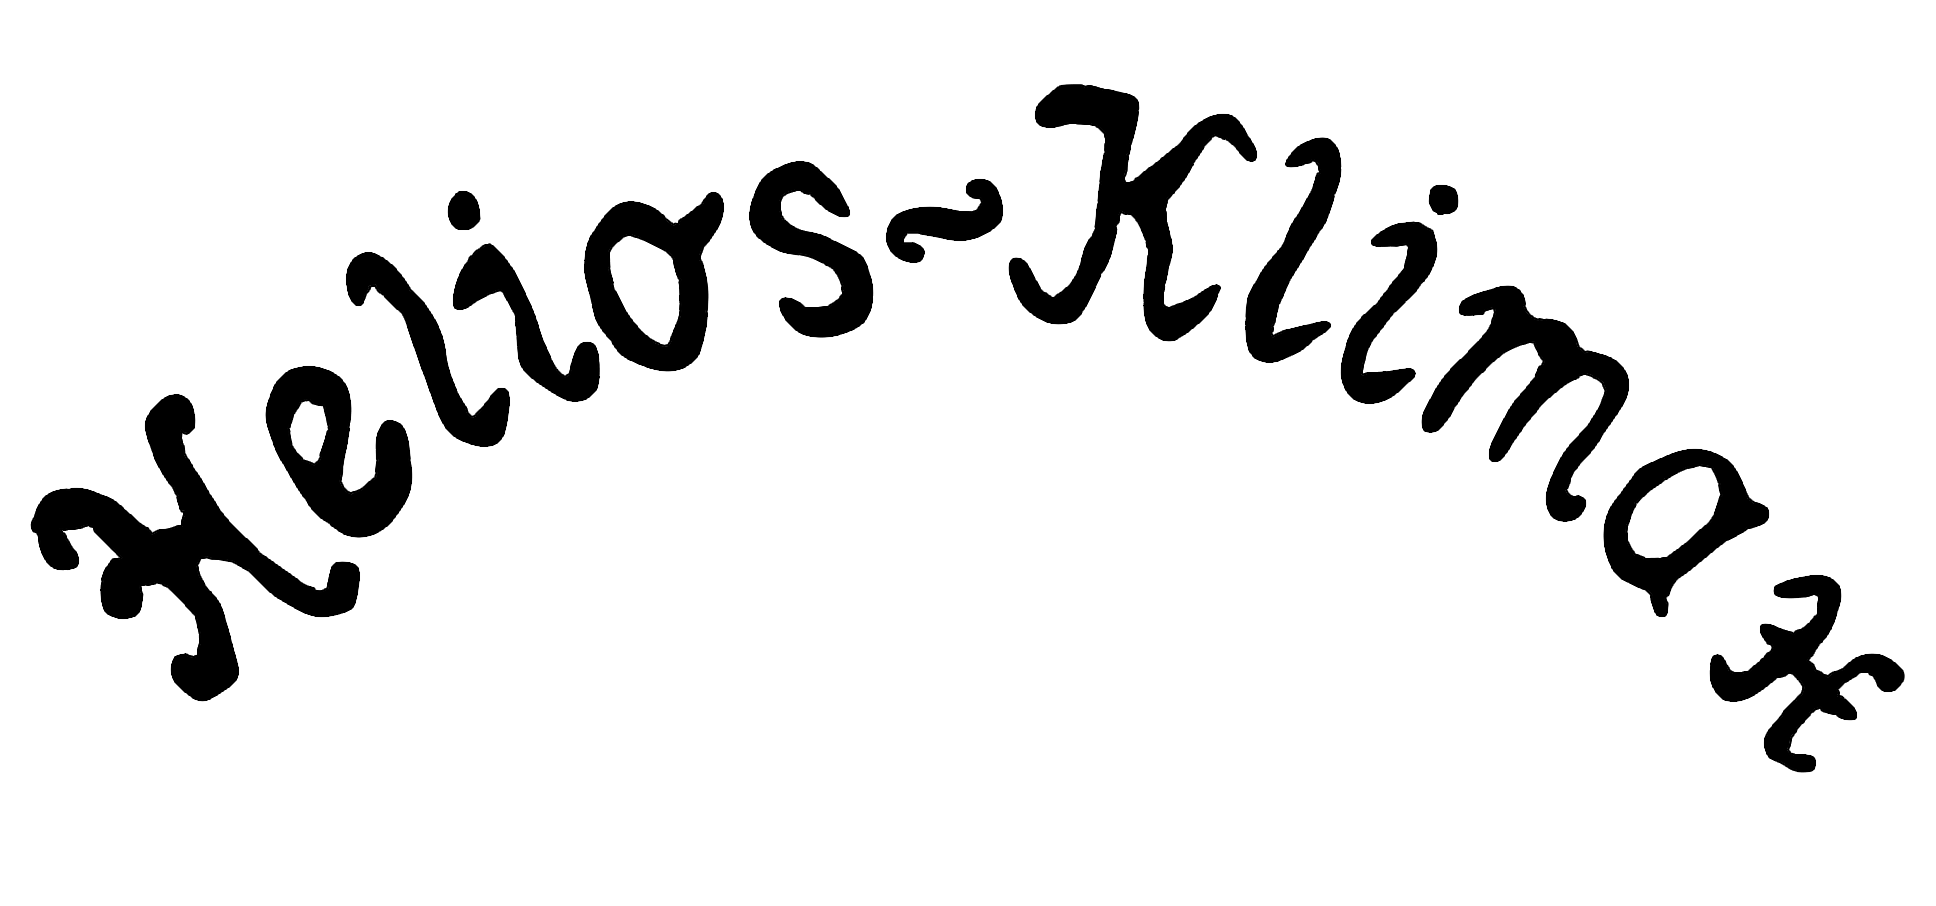
v4-generated Helios Klimax type element, with the original logo engraved on the top face — a v4-only addition ported from the machine's v1 SVG artwork. Drag to rotate, scroll/pinch to zoom, right-click or two-finger drag to pan.
Hammond Shuttles & Index
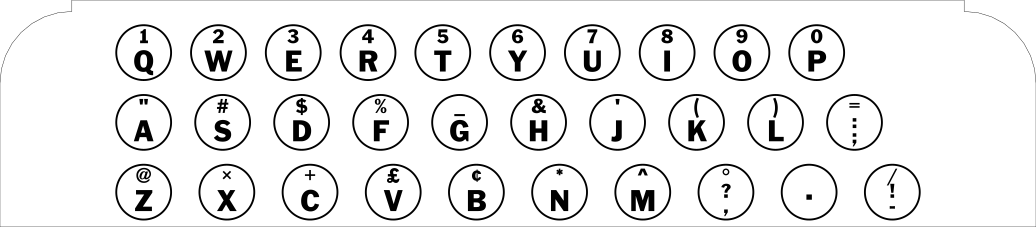
Hammond typewriters print from a curved shuttle — a die-cast type bar arranged in an arc — rather than a typebar or wheel, and later models could swap shuttles to change typeface or language entirely. But the shuttle design itself changed early on: the very first Hammond Model 1 used a two-piece split shuttle — a much more complex mechanism built around precision telescoping tubes and a rudimentary type-selection linkage. It was fairly quickly superseded by the conventional one-piece curved shuttle, which then stuck around essentially unchanged for the rest of Hammond’s run and on into Varityper machines in the 1940s. Because so few split shuttles were made and the design is that much harder to keep intact, working originals are rare and highly desirable to collectors — frequently missing or damaged is the norm, not the exception.
This directory covers both the Model 1 split shuttle and the conventional standard shuttle used from the Multiplex onward, plus the index variant and a Glagolitic shuttle for the old Slavic script. I own two Hammond Multiplex machines myself, including one still waiting on a mathematical shuttle.
v4-generated Hammond Model 1 split shuttle — the original two-piece telescoping-tube mechanism, superseded by the conventional one-piece shuttle used from the Multiplex onward. Drag to rotate, scroll/pinch to zoom, right-click or two-finger drag to pan.
The split shuttle’s mechanism doesn’t end at the printed part. Reproducing it means fabricating and assembling a set of precision telescoping tubes separately from the resin print — four pieces total: a central shaft, a left tube and a right tube that telescope over it, and a fourth part built into the machine itself that surrounds all three. Every one of those interfaces needs a precision tight sliding fit, and the tube lengths are just as critical as their diameters. Four pins tie the assembly together. To bond each tube to its printed housing, the tube seat is ringed with a glue groove and injection holes, so adhesive can be worked all the way around the joint once the tube is seated, rather than relying on a bead applied before assembly.
v4-generated Hammond shuttle — specifically a Mathematical model, a rare variant with two shifts beyond the standard CAPS/FIGS: NUM and DEN (numerator/denominator), reached via a fourth row that lets the machine set fractions and access additional symbols. Drag to rotate, scroll/pinch to zoom, right-click or two-finger drag to pan.
The conventional shuttle has its own fabrication requirement outside the resin print: a laser-cut metal plate with a brass insert, currently designed in Fusion 360. It’s also a candidate for FDM printing instead of laser-cutting — faster and cheaper to produce, at the cost of being more wear-prone, which actually suits it well as a replaceable, consumable part for rapid testing rather than a permanent metal original.
Hammond also gets a generated legend (generate_legend.py), optionally installable on the machine for whenever a shuttle’s own key legends don’t match the characters actually mounted — a mathematical shuttle on a machine with QWERTY-labeled keys, for instance.
Related typewriters in my collection:
-
1890 Hammond Model 1 (Serial: 15058)
-
1913-15 Hammond Multiplex (Serial: 224478)
-
1915- Hammond Multiplex (Serial: CC231416)
Mignon Index Elements
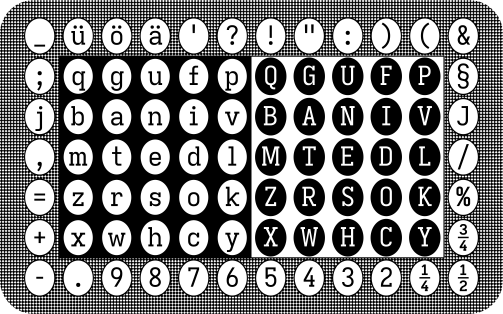
The AEG Mignon (models 2/3/4) is an index typewriter — instead of a keyboard, you guide a pointer over a printed character index and press a lever to print. The cylindrical index element supports 32+ languages through a shared layout system, so a new language is a matter of generating a new index rather than redesigning the mechanism.
v4-generated Mignon index cylinder — the actual mesh, not a still render. Drag to rotate, scroll/pinch to zoom, right-click or two-finger drag to pan.
Since the index cylinder alone carries no visible character map once it’s mounted, actually using it also means matching it to a printed legend — a reference card showing which character sits at which drum position, generated by the same toolchain (generate_legend.py). And since that legend has to live somewhere on the machine, I designed a replacement holder for it rather than disassemble an original just to swap one in — it 3D-prints as its own part, with a slot to slide the legend card into and a mounting profile that pops directly into the machine alongside the element.
Mignon index legend holder — a Fusion 360-designed accessory (not part of the parametric pipeline), with a slot for the legend card and a mount that pops into the machine alongside the printed element. Drag to rotate, scroll/pinch to zoom, right-click or two-finger drag to pan.
Related typewriters in my collection:
-
1925 Mignon No. 4 (Serial: 352222)
-
Mignon No. 4
Postal Type Elements
A calibrated element for the Postal No. 3 (c. 1901–08) — one of which is in my own collection.
v4-generated Postal No. 3 type element — the actual mesh, not a still render. Drag to rotate, scroll/pinch to zoom, right-click or two-finger drag to pan.
Related typewriters in my collection:
- 1901-08 Postal No. 3 (Serial: 14550)
Type Slugs
A different, smaller thing from everything above: a type slug is the individual metal-type-style element a typebar or shuttle actually carries, not a full keyboard/typewriter build — so this is a set of five small standalone replicas rather than another machine to restore. Most of them are novelty/reference pieces, not functional replacement parts, with one exception: the Gauge Slug is real and functional, meant to be installed on the machine to measure typebar swing and alignment-cut position directly. The other four are the generic Type Slug, the Vogue Slug (a faithful replica of a real 2-piece “Vogue Foundry” mark, modeled from real drawings), the Oliver Slug (modeled after a real Oliver typewriter slug — I own an Oliver No. 3), and the Lumi Slug (a novelty 4-character loop pendant).
This whole family dates back to v1 and was never carried into v2 at all, so porting it into v4 meant treating v1 as ground truth rather than diffing against a v2 file like every other machine here.
v4-generated generic Type Slug — the base slug design shared across the family. Drag to rotate, scroll/pinch to zoom, right-click or two-finger drag to pan.
v4-generated Vogue Slug — replica of a real 2-piece "Vogue Foundry" mark, modeled from real drawings. Drag to rotate, scroll/pinch to zoom, right-click or two-finger drag to pan.
v4-generated Oliver Slug — replica of a real Oliver typewriter type slug. Drag to rotate, scroll/pinch to zoom, right-click or two-finger drag to pan.
Related typewriters in my collection:
- Oliver No. 3
Engineering Details
Four things that don’t show up in the finished part but drive most of the actual design work:
Inner shaft design. Every cylindrical element (Blickensderfer, Postal, Bennett, Mignon, Helios) mounts by slipping over a central spindle inside the typewriter — so the bore running through the middle has to be a precise slip fit, not just “roughly round.” Resin shrinks slightly as it cures, so the bore’s as-printed diameter isn’t the same as its as-designed diameter, and that offset has to be found empirically per resin/printer combination rather than assumed. A small calibration print (the “Shaft Gauge Test set”) exists specifically to dial in that offset before committing to a full element.
v4-generated cutaway of a Blickensderfer element — the knurled center post is the precision slip-fit shaft interface, surrounded by the drive-pin holes it aligns against. Drag to rotate, scroll/pinch to zoom, right-click or two-finger drag to pan.
The Minkowski draft sweep. Every struck character needs a slight taper — wider at the root than at the tip — so it releases cleanly during printing and molding instead of undercutting itself. Nothing real gets built without one; a die-cast or molded part with zero draft can’t release from its tool at all. That taper is generated with a real Minkowski sum (dilating the character solid by a draft cone via manifold3d), not a cheaper per-vertex outline offset — the offset approach was tried first and abandoned after it self-intersected on narrow features (the gap inside an ‘H’, the diagonal junctions in a ‘k’ or ‘m’). A true Minkowski sum can’t produce that failure on any input topology, at the cost of being slower to compute.
v4-generated Blickensderfer 'A', before the Minkowski draft sweep — flat, undrafted walls. Drag to rotate, scroll/pinch to zoom, right-click or two-finger drag to pan.
v4-generated Blickensderfer 'A', after the Minkowski draft sweep — the same character, Minkowski-summed with a draft cone, visibly wider at the root. Drag to rotate, scroll/pinch to zoom, right-click or two-finger drag to pan.
Getting the characters right, from the original catalogs. A type element is only correct if the right character sits at the right position — and for a machine that hasn’t been manufactured in a century, “the right character” is a historical question, not a design decision. Hammond and Blickensderfer both published type catalogs listing every shuttle and typewheel they sold, printed as literal specimens: three rows of characters, exactly as that element would type them. Those catalogs are the primary source, and layouts are transcribed from scans of them rather than reconstructed from a modern keyboard.
Doing that carefully turned up two genuine errors that had been carried in the code since 2022 — each one silently dropping a letter the machine obviously needed. Hammond’s Ideal layout had a d where the catalog clearly prints a b, leaving b absent from the element entirely and d duplicated. Blickensderfer’s CHARIENSTU layout ended its capital row in U instead of Y, dropping Y. Both were found the same cheap way: compare the lowercase row’s letters against the uppercase row’s, and a duplicated letter alongside a missing one falls straight out. Neither would have produced an error at print time — just a wrong part, discovered at the typewriter.
The other thing the catalogs make obvious is how much of the variety is typeface rather than layout. Roughly eighty Hammond entries collapse to a handful of genuinely distinct character arrangements; “Small Roman,” “Large Gothic,” “Clarendon,” “Vertical Script” and “Caps and Small Caps” are all the same key positions in a different face. That distinction matters practically — it’s the difference between needing a new font and needing new geometry — and it’s why the generator treats them as separate axes.
The per-language shuttles are the interesting tail: Hammond’s 1915 catalog is organised by language rather than by part number, and includes Dutch, Spanish, Croatian, Danish, Portuguese, Polish, Roumanian, Russian, Servian and more, each with its own accented character set. Those are transcribed as they’re verified, character by character — the full transcription record documents which are done, which are still ambiguous in the scans, and the reasoning behind every judgement call.
Custom-coded resin supports. Rather than leaving support placement to a slicer’s auto-support algorithm — which has no idea which faces are struck characters that need to stay clean — every machine has its own hand-coded ResinSupport() geometry, positioned around the element’s real anchoring points and unioned with the body into one print-ready mesh. It’s a genuinely different scheme per machine family (a Hammond split shuttle’s supports have nothing in common with a Blickensderfer typewheel’s), tuned against real print failures rather than generic defaults.
Three machines’ support schemes side by side, as interactive meshes rather than a single still:
v4-generated Blickensderfer resin-support structure — support rods plus a breakaway ring, with a cut groove machined around the ring to guide a clean break away from the element once printing is done. Drag to rotate, scroll/pinch to zoom, right-click or two-finger drag to pan.
v4-generated Hammond split shuttle resin-support structure — a completely different scheme from the Blickensderfer's, built around the split shuttle's own telescoping-tube anchoring points. Drag to rotate, scroll/pinch to zoom, right-click or two-finger drag to pan.
v4-generated Selectric I/II resin-support structure — a third distinct scheme, built for the spherical typeball's own anchoring geometry. Drag to rotate, scroll/pinch to zoom, right-click or two-finger drag to pan.
Process
All of these use the same basic workflow: parametric modeling in OpenSCAD, high-precision resin 3D printing, and iterative fitment testing against the real mechanism — either in person or, for the Selectric Composer and Helios Klimax, entirely over email with collaborators on other continents.
For inquiries about custom type elements or collaboration, reach out at elements@leonardchau.com or on Instagram (@blick_elements).
Licensing
Print these for yourself, freely. That’s the point of the project. These machines are a century old, the parts stopped being manufactured decades ago, and a typewriter sitting idle for want of a typewheel is the problem all of this exists to solve. Every model on this page is generated by an open pipeline that anyone can download and run — no permission needed, no fee. Print a wheel for your Blickensderfer, a shuttle for your Hammond, a set for someone in your restoration club. Giving prints away is fine too, as long as no money changes hands.
Selling prints is the one thing reserved. If you want to sell them, get in touch — the answer isn’t automatically no, and it’s the same conversation as a custom commission.
The software and the designs are licensed separately, because they’re different kinds of work. The pipeline itself — the Python, the tuner, the OpenSCAD history — is under the GPL: fork it, port a new machine, build something else on it, as long as you keep it open and publish your changes. The machine dimensions and calibration values, and the STL files on this page, are under CC BY-NC-SA 4.0: share and adapt them non-commercially, with credit.
That data is worth calling out specifically, because it’s the part that took the longest. Bore diameters, character protrusions, baseline positions, per-resin shrinkage offsets — most of it arrived at by measuring originals and iterating through failed prints, and none of it is guessable from a photograph. It’s what separates a part that fits from a part that doesn’t.
Full terms are at type-elements.leonardchau.com/license. One caveat worth knowing before you publish or sell anything printed from this: a generated element carries glyph outlines from whatever font produced it, and the license here covers the element geometry, not the letterforms — some commercial fonts restrict embedding their outlines in physical products, and that part is between you and the font.
From OpenSCAD to Python
The toolchain has gone through four real rewrites since 2022 — each one driven by a specific, measured limitation of the version before it, not a rewrite for its own sake:
- v1 — raw, one-off OpenSCAD files, one per machine, no shared code between them. Parameters adjusted live through OpenSCAD’s Customizer panel. This is where every machine started, and it’s how the first Blickensderfer typewheels actually got designed.
- v2 — extracted the logic every machine actually had in common (the glyph pipeline, resin support, core/shaft, per-machine layouts) into a shared OpenSCAD
lib/, so a second or third machine stopped meaning a full copy-paste-and-modify. Still built the character draft taper with OpenSCAD’s own built-inminkowski(cone)operation, though — which is where the next rewrite came from. - v3 (experiment, dead end) — OpenSCAD’s
minkowski()is correct but slow at this scale, so v3 tried swapping it for build123d’s real B-repdraft()(OpenCascade) instead. It didn’t hold up: at the real 27.5° target angle it self-intersects on ordinary straight-stroke letters, and it rejects curved-stroke glyphs outright (draft()only accepts faces swept from straight-line profiles — most real fonts, most letters, don’t qualify). Confirmed not viable and shelved, but it’s what proved OpenSCAD’s approach couldn’t just be swapped for a faster one without solving the underlying problem differently. - v4 (current) — a full rewrite in Python, first attempted with a per-vertex mesh-offset technique adapted from a friend’s 2023 tool: fast, but topology-blind — a fixed-distance push per outline vertex has no way to detect when a glyph’s local geometry (the gap inside an ‘H’, the diagonal junctions in a ‘k’ or ‘m’, ‘i’ ‘s separate dot) is too tight to support that offset, and it just folds through itself instead of failing loudly. Patches fixed some cases and broke others (a self-union repair that welded ‘i’ ‘s dot into its stem, losing real volume). The fix was a real Minkowski sum via
manifold3d— mathematically guaranteed not to self-intersect on any input topology, so there’s no per-glyph failure case left to chase. Every assembly boolean was moved to realmanifold3dCSG at the same time, after plain mesh concatenation was found to silently produce wrong geometry wherever two parts overlapped (a measured 1148mm³ double-counted-overlap bug — concatenation merges vertex/face arrays with no boolean resolution, so overlapping surfaces just stayed superimposed instead of forming a real intersection edge).
v4 also brought a shared pipeline with common glyph handling, logging, and tooling across every machine:
- Adaptive glyph-contour tracing replaces a fixed
points_per_mmsampling rate with aflatness_tolerance_mm-driven adaptive tracer — denser sampling on tight curves, sparser on straight runs, instead of one blanket resolution for every glyph - Cross-platform setup —
setup.sh/setup.batbootstrap the environment on Linux/macOS and Windows alike, including auto-installing f3d for STL preview tune.py(the interactive calibration/preview GUI) got a reworked machine picker — Cylinders/Shuttles/Spheres grouped into their own columns instead of one long collapsible tree — plus a real Layout tab for the Selectric family and per-machine config scratch copies so edits to one machine’s settings can’t bleed into another’s- Resin selection notes — documented tradeoffs between glyph fidelity and toughness across resin types, from real print testing
- Unified console logging (
lib/build_log.py) across every machine script, replacing ad hocprint()calls with consistent per-character and mesh-summary output - Catalog-derived layouts — every machine’s keyboard layouts moved into one shared module and cross-checked against the manufacturers’ own printed type catalogs, which corrected two long-standing character errors and added the per-language Hammond shuttles (see the transcription record)